Projects

Description

Under Projects you will see pictures of your projects in different categories as a picture gallery.

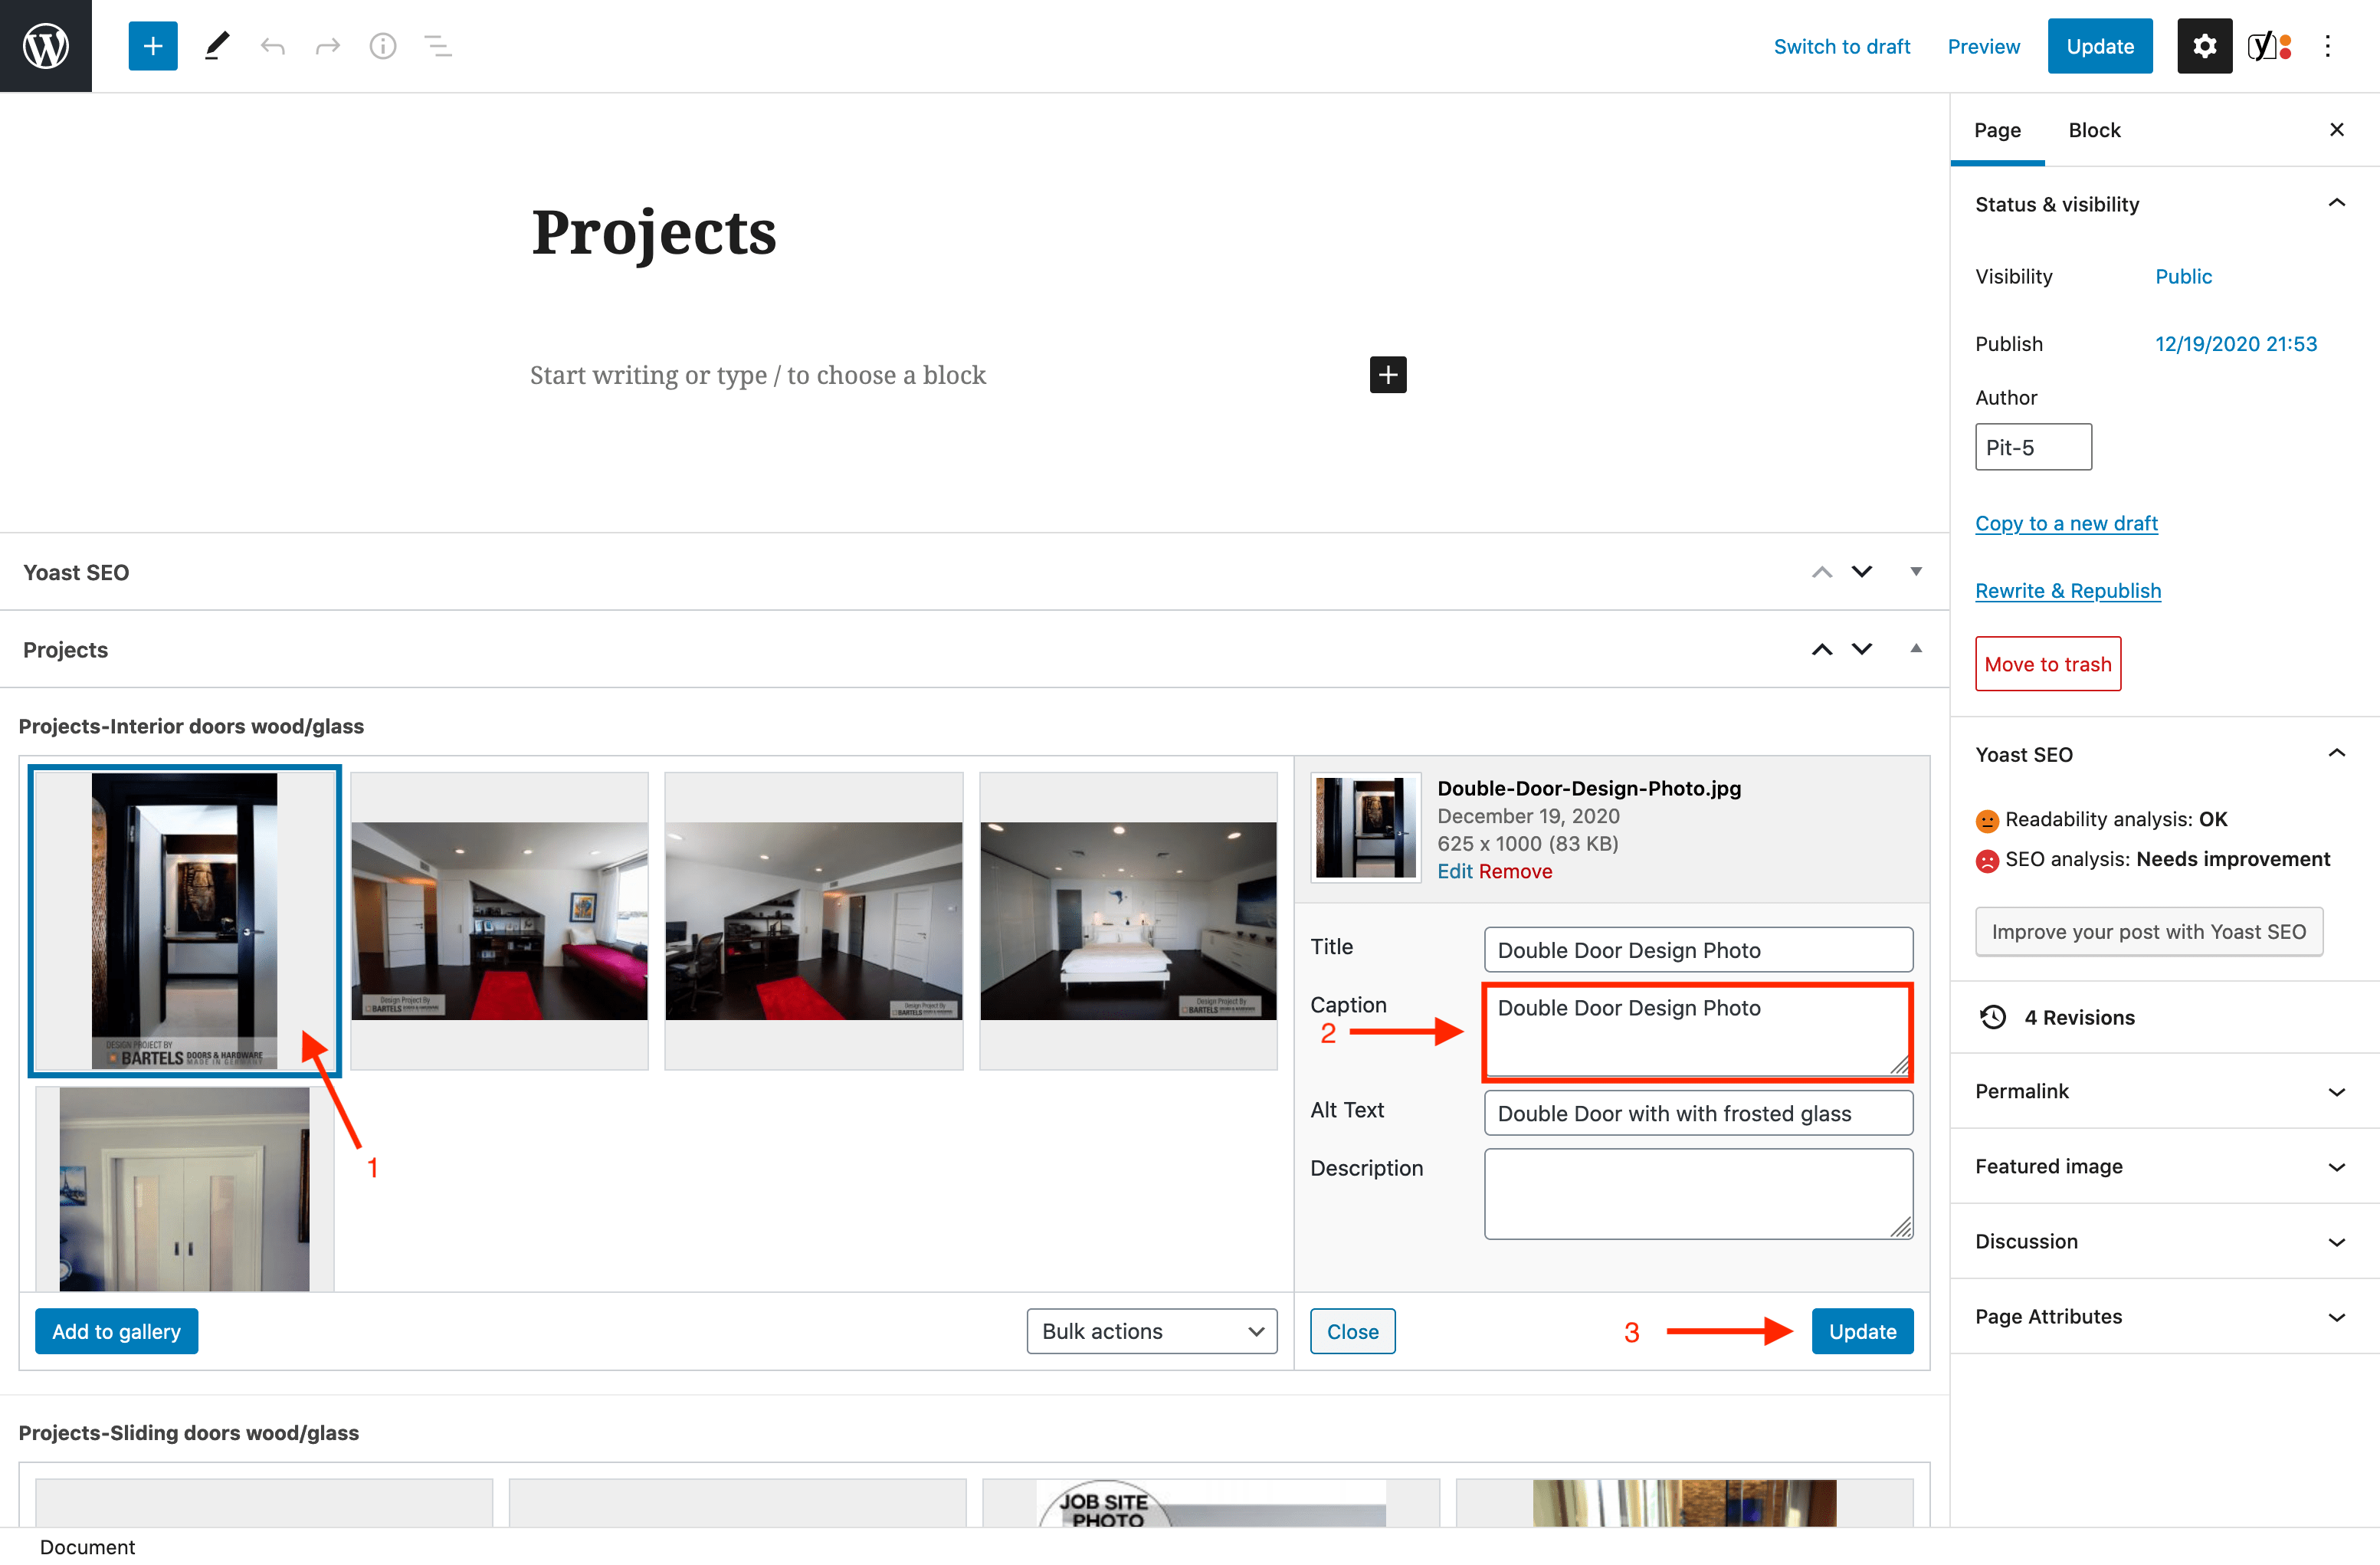
There is the possibility to give pictures a description. This description will appear on the image when you roll over or in the large view below the image.

Note: You need to resize and compress the images in Photoshop (image editor). We don't have any software on wordpress that supports that.

You can find instructions here. It's simple.

Instruction

Four categories

  • There are currently four categories: Interior Doors wood/glass, Sliding Doors wood/glass, Room Dividers and Interior Ladders.
  • As long as there are no images in the corresponding category, it will not be displayed (currently for ladders).
  1. Go to "Edit post" and edit the page.

Page in CMS

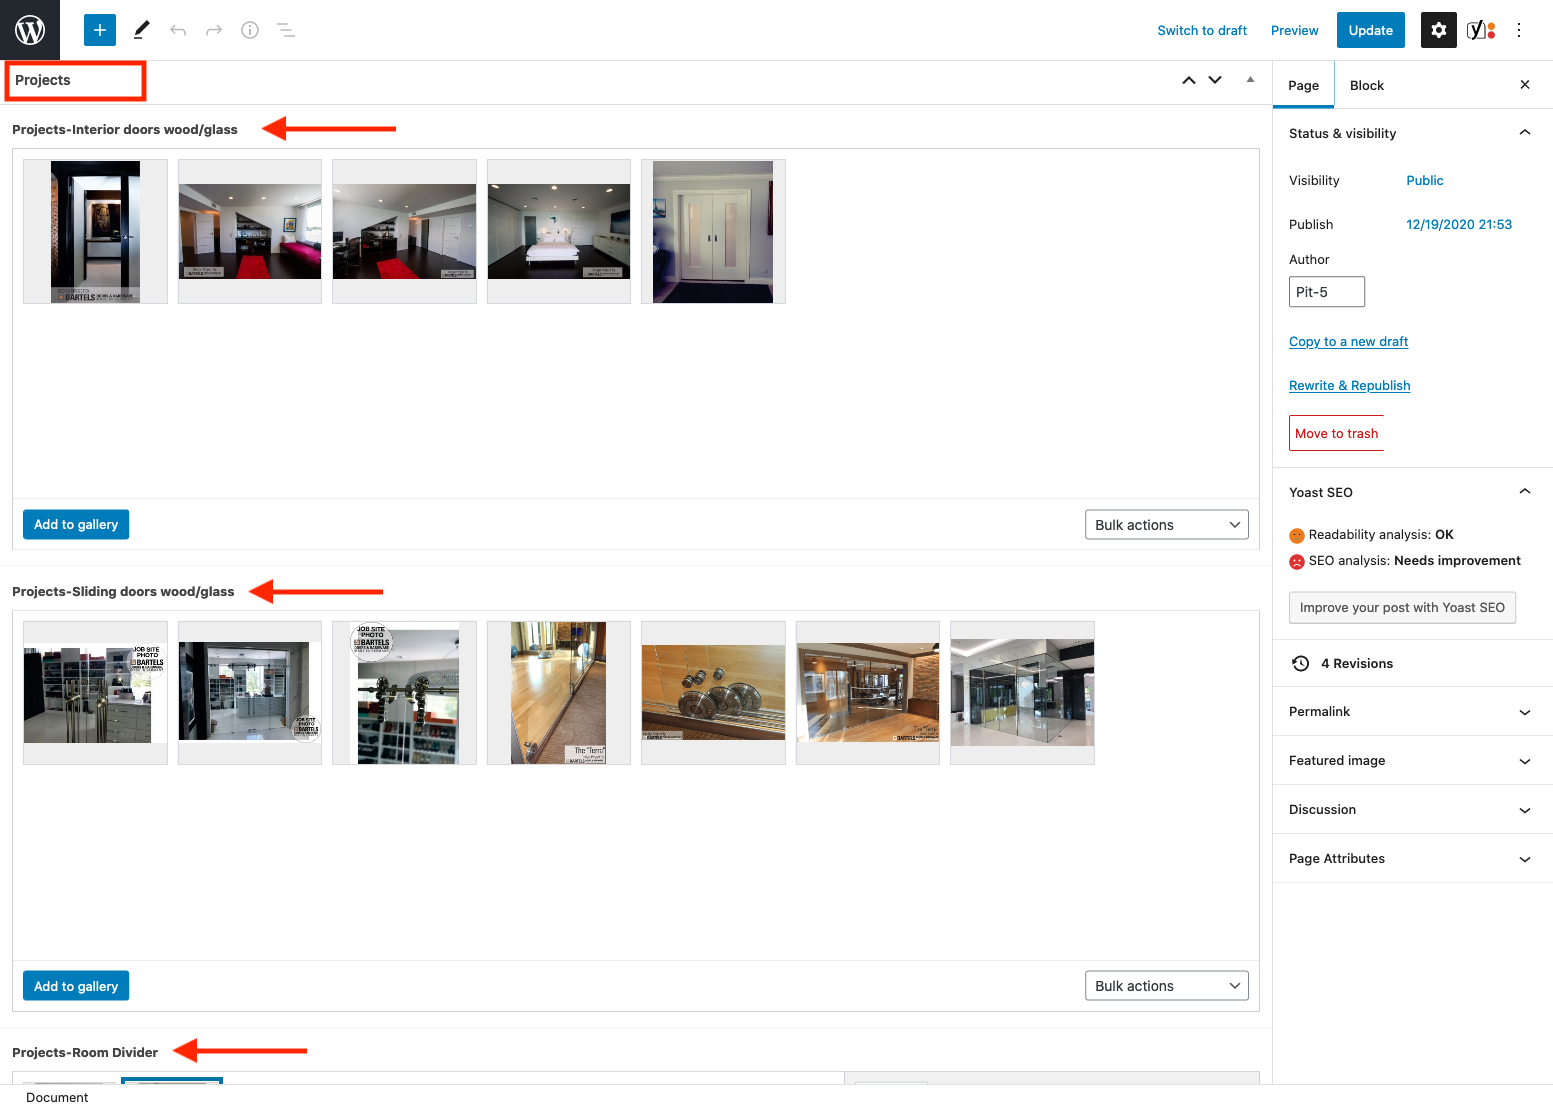
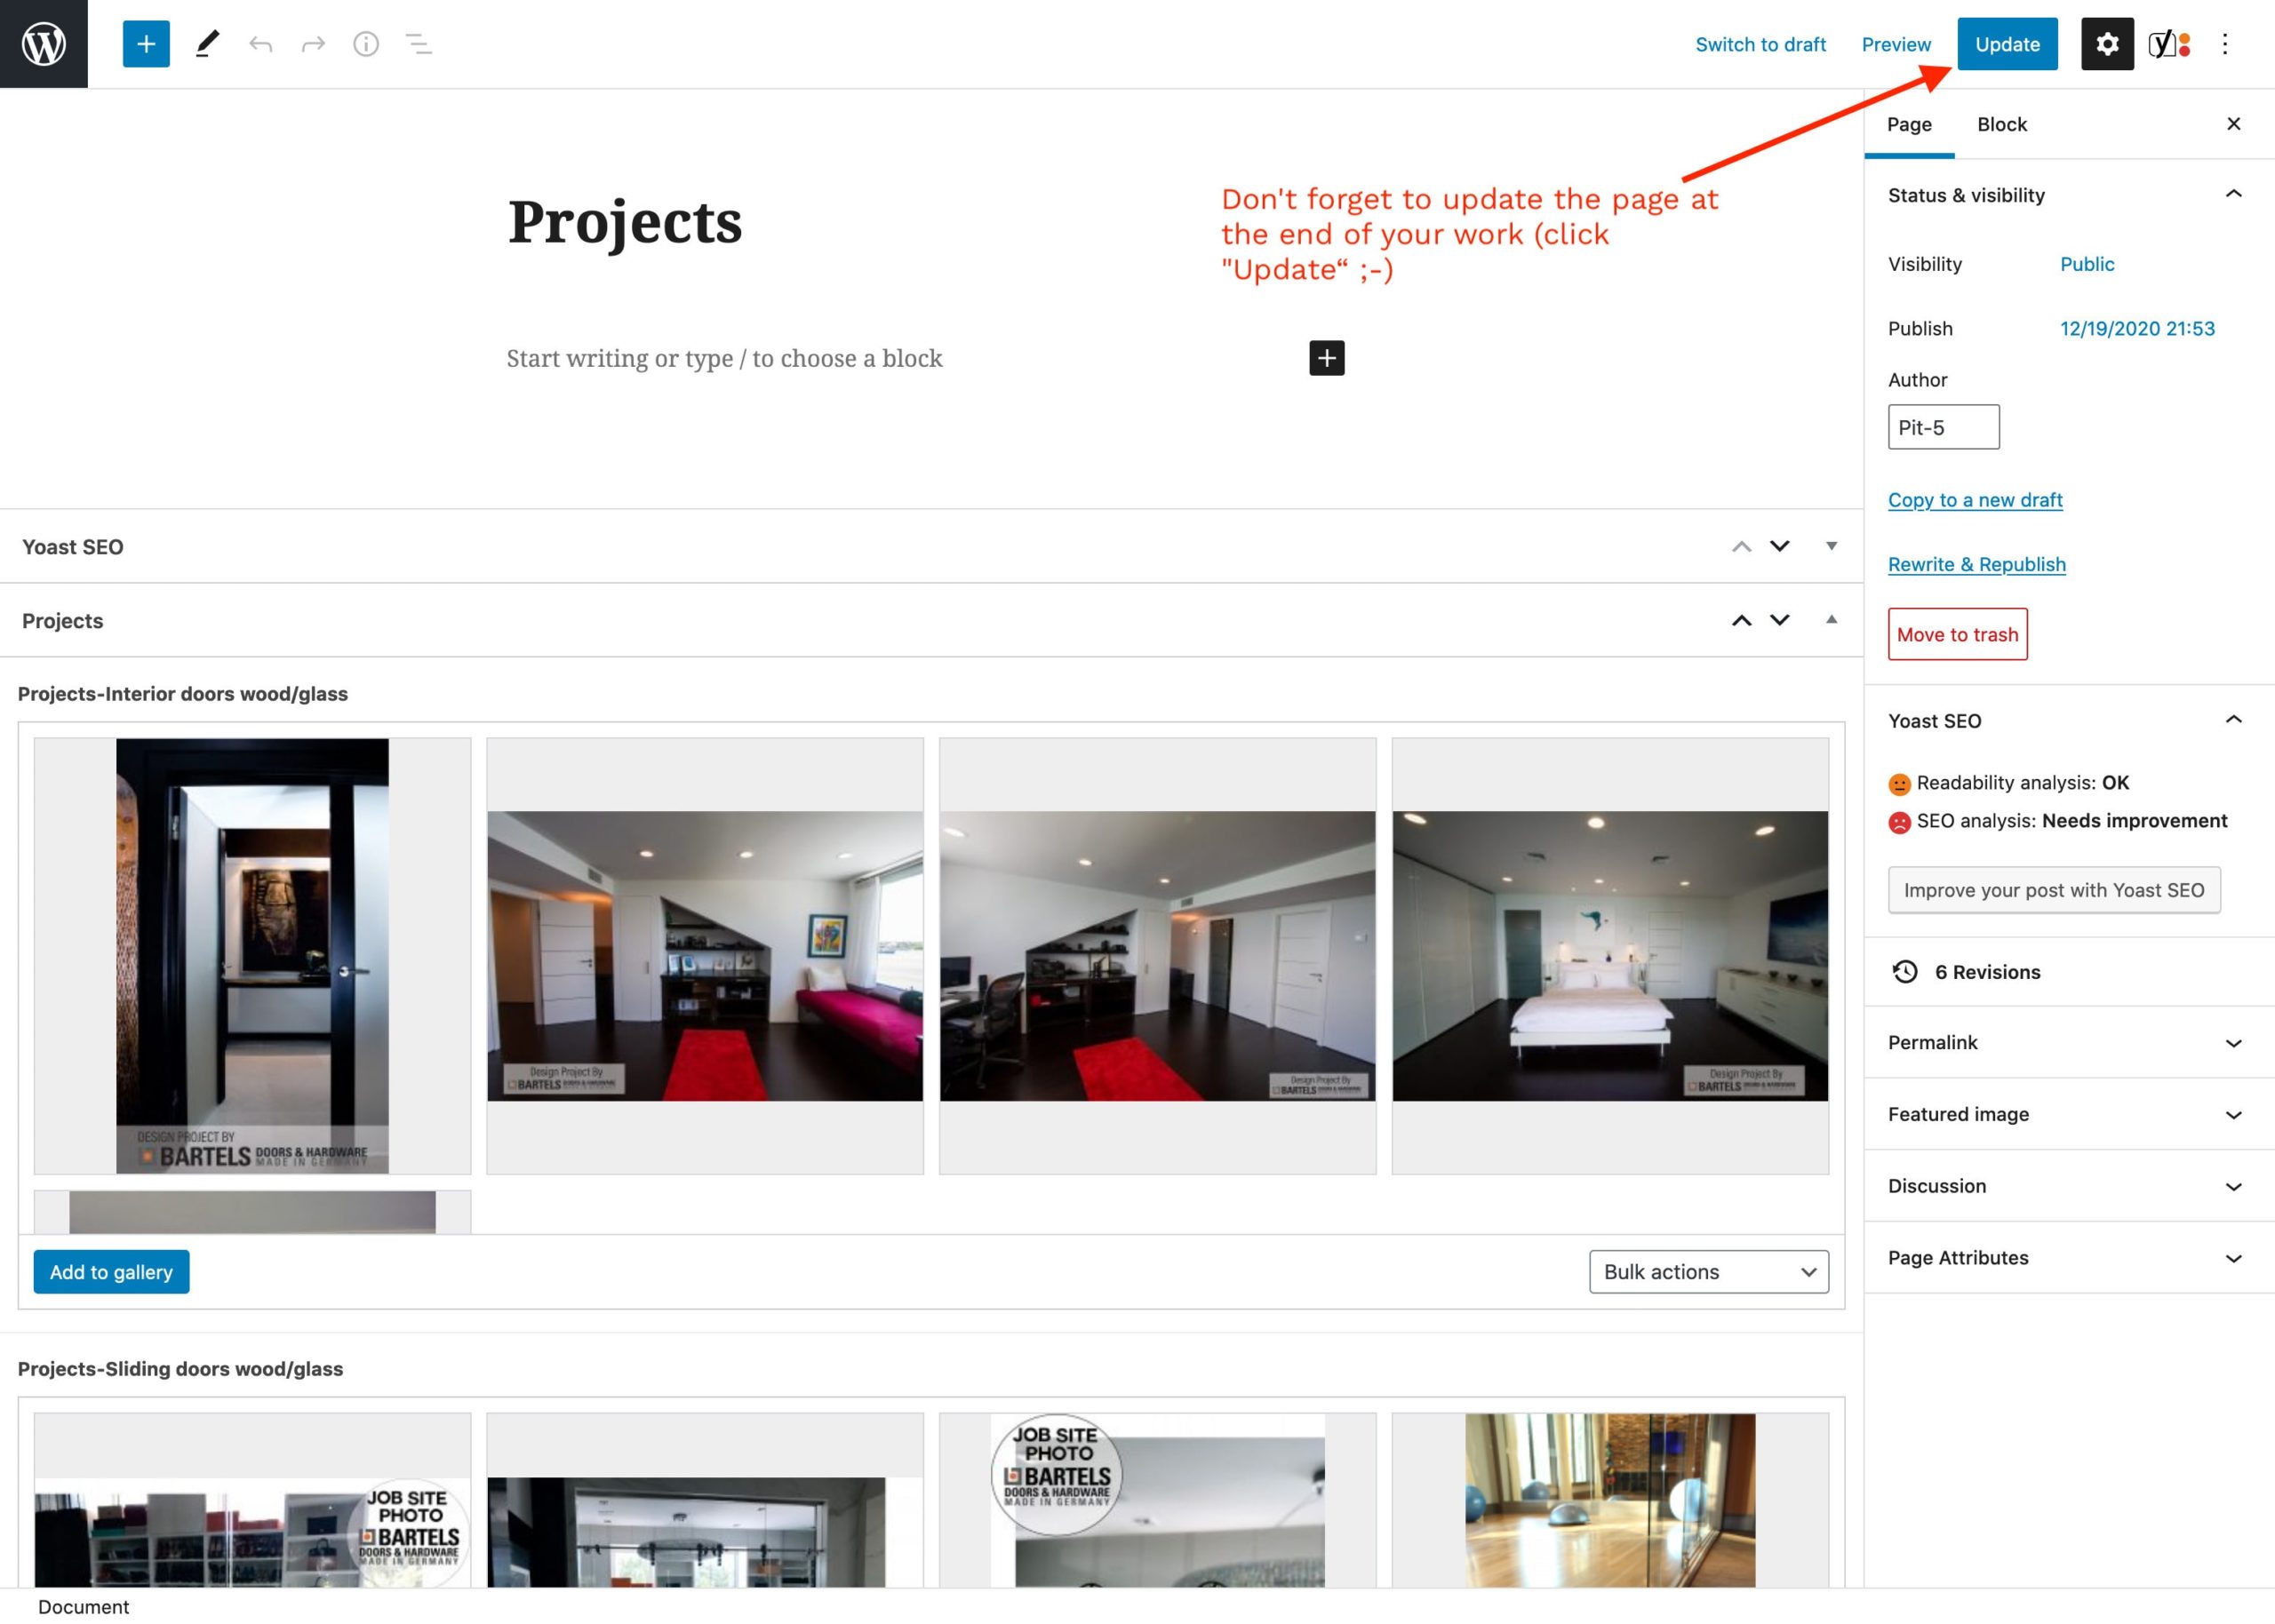
There is a picture gallery for each category.

Here you can add, sort (drag and drop) or delete (x on hover) images and also enter descriptions for the image.

Description to the image - appears during rollover and in the large view

  • The image descriptions appear on the image during rollover.
  • Descriptions to the image can be made here or in the Media Library.
  1. Click on one of the images. On the right side a dialog box opens with different input fields.
  2. For the description that should appear on roll over or on large view, fill in the "Catption" field.
  3. Click on Update

Add images

  1. Click on "Add to Gallery" to add pictures

Add images – a popup opens

  • A popup will open.
  • In it you will find a folder called "Projects". There are four folders with the individual categories.
  1. Select the folder in which you want to load or select images.
  2. Add images via drag and drop – you can upload several images at the same time

Note: The structure with the folders is an extra tool that organizes the media library. The media library in WordPress has few possibilities to sort.

If the folder structure is not visible and the media library behind it, all images are sorted by the setting date.

You can also add images then.

Add images - label and select images

  • Already selected images are outlined in blue and softened in gray.
  • The newly uploaded images appear automatically selected. They are outlined in blue and a check mark appears in the upper right corner. You can deselect them manually.
  • Here you also have the possibility to add the "Caption".
  • Finally you have to click on "Select" at the bottom right to add the images to the gallery.

Don't forget to update the page at the end of your work (click "Update")

Go to this page (bartelsdoors.com)
You must be logged in to the CMS to edit this page.
Questions, comments, extensions
Email
Copyright © 2026 All Rights Reserved
Top crossmenuchevron-downarrow-left